今回はTwitterに投稿する方法について書いていこうと思います。投稿の仕方はiOSはSocial.frameworkを使用し、AndroidはIntentによってTwitterのActivityを起動することによって投稿します。
iOSでの投稿
まずSocial.frameworkを使うために、ネイティブプラグインを作成します。内容は引数の値を元にSocial.frameworkを使用しているだけなので割愛します。
|
1 2 3 4 5 6 7 8 9 10 11 12 13 14 15 16 17 18 19 20 21 22 23 24 25 26 27 28 |
#import <Social/Social.h> void _PostMessage(const char *text, const char *url, const char *textureURL) { NSString *_text = [NSString stringWithUTF8String:text ? text : ""]; NSString *_url = [NSString stringWithUTF8String:url ? url : ""]; NSString *_textureURL = [NSString stringWithUTF8String:textureURL ? textureURL : ""]; SLComposeViewController *composeViewController = [SLComposeViewController composeViewControllerForServiceType:SLServiceTypeTwitter]; composeViewController.completionHandler = ^(SLComposeViewControllerResult res) { [composeViewController dismissViewControllerAnimated:YES completion:nil]; }; if ([_text length] != 0) { [composeViewController setInitialText:_text]; } if ([_url length] != 0) { [composeViewController addURL:[NSURL URLWithString:_url]]; } if ([_textureURL length] != 0) { UIImage *image = [UIImage imageWithContentsOfFile:_textureURL]; if (image != nil) { [composeViewController addImage:image]; } } [UnityGetGLViewController() presentViewController:composeViewController animated:YES completion:nil]; } |
ネイティブプラグインが作成できたら、Unityで投稿するためのスクリプトを作成します。まず、実際に投稿を行う前に投稿する画像を一度端末に保存する必要があるので、そのメソッドを作成します。また、ファイルの書き込みには名前空間にSystem.IOを追加する必要があります。
|
1 2 3 4 5 6 7 8 9 |
string filePath = Application.persistentDataPath + "/hackist_icon.png"; private void saveImage(){ var tex = Resources.Load("hackist_icon") as Texture2D; byte[] screenshot = tex.EncodeToPNG(); string filePath = Application.persistentDataPath + "/hackist_icon.png"; if (!System.IO.File.Exists (filePath)) { File.WriteAllBytes (filePath, screenshot); } } |
これは一度画像を読み込んだあと、byte配列に変換したものをアプリのDocumentフォルダに保存しています。Application.persistentDataPathはDocumentフォルダのパスを返します。
保存ができたら今度はネイティブプラグインに値を渡してSocial.frameworkを起動して投稿用のダイアログを表示させます。
|
1 2 3 4 5 6 7 |
[DllImport ("__Internal")] private static extern void _PostMessage(string text, string url, string textureUrl); public void twitterShareAction(){ saveImage (); _PostMessage("", "", filePath) } |
メソッドが実行されるとこのようにダイアログが表示されます。
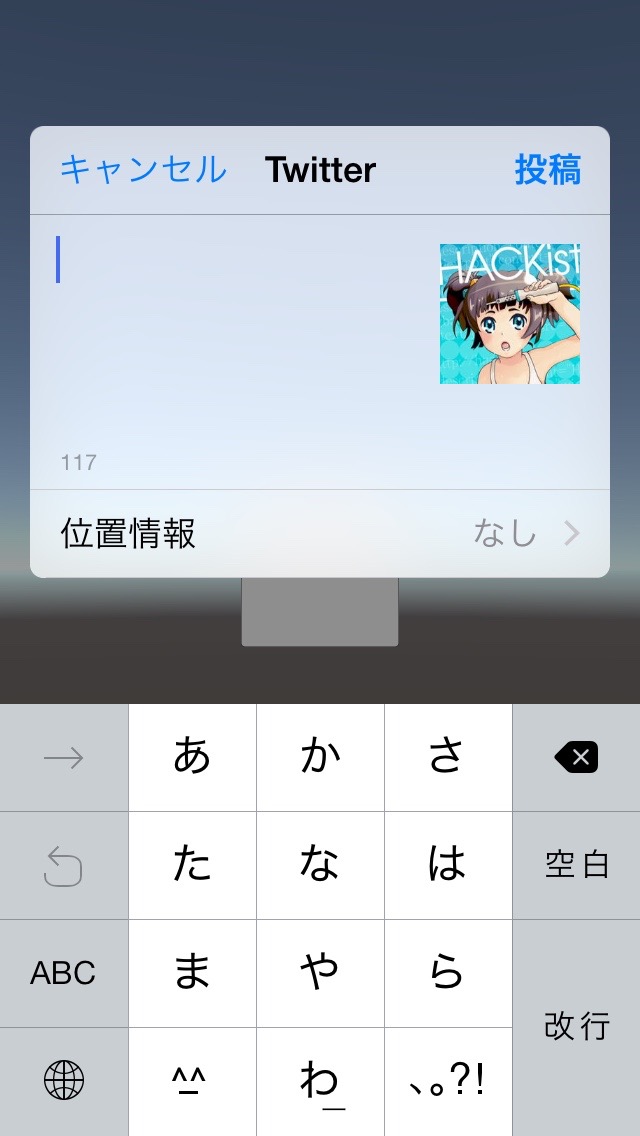
Androidでの投稿
AndroidはまずActivityを取得し、IntentをAndroidJavaObjectで作成します。そして作成したIntentにステータスを追加してActivityを起動します。また、Player SettingからWrite AccessをExternalに変更する必要があります。
|
1 2 3 4 5 6 7 8 9 10 11 12 13 14 15 16 17 18 19 20 21 22 23 24 25 26 27 28 29 30 31 32 33 34 35 36 37 38 39 40 41 42 43 44 45 46 |
public void twitterShareAction(){ _PostMessage("Twitter", "", "",".png"); } private void _PostMessage(string type, string text, string url, string imageName) { var packageName = string.Empty; var tex = Resources.Load("hackist_icon") as Texture2D;; byte[] screenshot = tex.EncodeToPNG(); string filePath = Application.persistentDataPath + "/image.png"; File.WriteAllBytes(filePath, screenshot); packageName = "com.twitter.android"; ActionSend(text, url, filePath, packageName); } static void ActionSend(string text, string url, string textureUrl, string packageName) { #if UNITY_ANDROID using (AndroidJavaClass jcUnityPlayer = new AndroidJavaClass ("com.unity3d.player.UnityPlayer")){ using (AndroidJavaObject joActivity = jcUnityPlayer.GetStatic<AndroidJavaObject> ("currentActivity")){ using (var intent = new AndroidJavaObject("android.content.Intent")) { intent.Call<AndroidJavaObject>("setAction", "android.intent.action.SEND"); intent.Call<AndroidJavaObject>("setType", "image/png"); if (!string.IsNullOrEmpty(packageName)) { intent.Call<AndroidJavaObject>("setPackage", packageName); } if (!string.IsNullOrEmpty(textureUrl)) { var uri = new AndroidJavaClass("android.net.Uri"); var file = new AndroidJavaObject("java.io.File", textureUrl); intent.Call<AndroidJavaObject>("putExtra", "android.intent.extra.STREAM", uri.CallStatic<AndroidJavaObject>("fromFile", file)); } using (var chooser = intent.CallStatic<AndroidJavaObject>("createChooser", intent, "")){ chooser.Call<AndroidJavaObject>("putExtra", "android.intent.extra.EXTRA_INITIAL_INTENTS", intent); joActivity.Call("startActivity", chooser); } } } } #endif } |
ここで少し問題なのが、このスクリプトはUnity5では動作しません。4.6.7f1までは動作するのを確認しました。動作しない理由としてはApplication.persistentDataPathがWrite AccessをExternalにしているとNullを返してしまうせいです。一応の対処法としてはApplication.persistentDataPathの代わりにAndroidのメソッドであるgetExternalFilesDir()を使用して直接パスを指定する方法などがあります。ちなみに画像を使用しなければ、Write AccessをExternalにする必要が無く、Intentを起動するのみなのでUnity5でもTwitterの起動までは出来ます。
終わりに
今回はTwitterに投稿する方法について書きました。Twitterに投稿するというよりかはSocial.frameworkの呼び出し方とIntentを作成してActivityを起動する方法がメインになってしまいました。
次回はLineに送る方法について書いて、一旦この連載も終了しようかと思います。
では、また。