はじめに
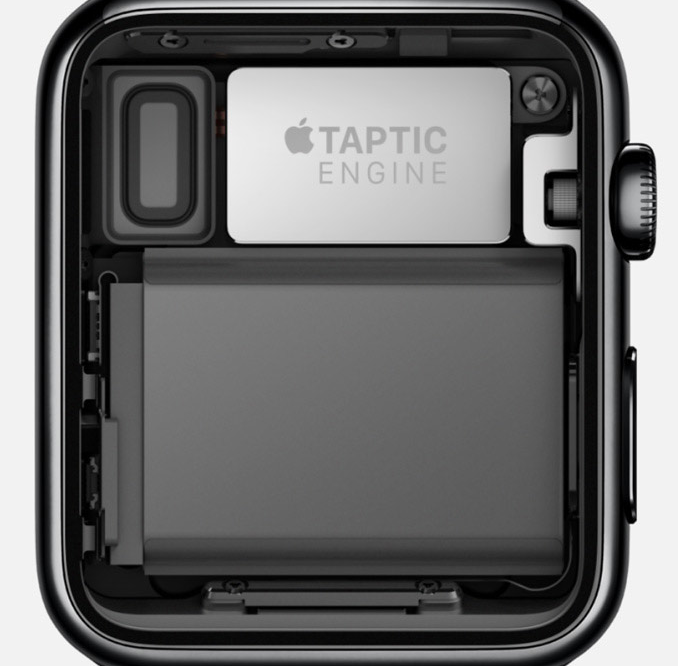
Taptic Engineって慣れないうちは本当に誰かに触られたか、虫でも触れたのかと思って、通知が来た時に「うおっ」と言いながら、腕を払ったことがありますが、慣れてくると結構気持ちが良いバイブレーションですよね。
watchOS2では、Taptic Engineも実装側で利用できるようになったので、今回は好きなだけバイブレーションさせることができるサンプルアプリを作りました。
iPhone側からバイブレーションを指示
最初にこれを作ろうと思った時、watch本体にボタン付けて、タップしたらTaptic Engineが動くで良いかなと思ったのですが
いや待てよ、watchをタップした時にぶるっと来るのでは、ちゃんとバイブレーションを楽しめないじゃないか、ないわ。
と思ったので、iPhoneからの操作でTaptic Engineが利用できるようにします。
iPhoneからwatchに指示するために、WatchConnectivityを利用します。
※WatchConnectivityを使って、実機デバッグする時は値が送信されないバグがあるので、解決方法については下記を参考にして下さい。
WatchConnectivityを実機デバッグするとエラーになる件
iPhone側の実装
プロジェクトの作成は詳しくやりませんが、Xcode7から簡単になってます。
File→New→Project→watchOSのApplicationでiOS App with WatchKit Appを選び、後はiOSアプリ作るのとほぼ同じです。 特に考えずにポチポチやれば出来ます。
というわけで、プロジェクトは出来てる段階から解説します。
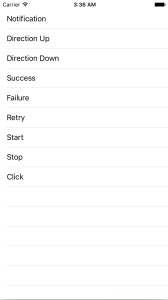
まず、Taptic Enginを使ったバイブレーションの種類は9つあるので、TableViewを使います。iOSアプリのstoryboardでtableviewを一つ配置し、Outletを引いて下さい。そしたらViewController.mを下記のように変更します。
|
1 2 3 4 5 6 7 8 9 10 11 12 13 14 15 16 17 18 19 20 21 22 23 24 25 26 27 28 29 30 31 32 33 34 35 36 37 38 39 40 41 42 43 44 45 46 47 48 49 50 51 52 53 54 55 56 57 58 59 60 61 62 63 64 65 66 67 68 69 70 71 72 73 74 75 76 |
#import "ViewController.h" #import <WatchConnectivity/WatchConnectivity.h> @interface ViewController () <WCSessionDelegate, UITableViewDelegate, UITableViewDataSource> @property (weak, nonatomic) IBOutlet UITableView *tableView; @property (nonatomic) NSArray *tableTitles; @end @implementation ViewController - (void)viewDidLoad { [super viewDidLoad]; // Do any additional setup after loading the view, typically from a nib. // テーブルのタイトル内容を初期化 _tableTitles = @[ @"Notification", @"Direction Up", @"Direction Down", @"Success", @"Failure", @"Retry", @"Start", @"Stop", @"Click", ]; _tableView.delegate = self; _tableView.dataSource = self; // WatchConnectivityの接続とdelegateをセット if ([WCSession isSupported]) { WCSession *session = [WCSession defaultSession]; session.delegate = self; [session activateSession]; } } #pragma mark - UITableView - (void)tableView:(UITableView *)tableView didSelectRowAtIndexPath:(NSIndexPath *)indexPath { // 選択された内容をWatchKit Appに送信 if ([[WCSession defaultSession] isReachable]) { [[WCSession defaultSession] sendMessage:@{@"haptic_type": @(indexPath.row)} replyHandler:^(NSDictionary *replyHandler) { NSLog(@"send"); } errorHandler:^(NSError *error) { NSLog(@"error : %@", error); } ]; } else { NSLog(@"isReachable = false"); } } - (NSInteger)tableView:(UITableView *)tableView numberOfRowsInSection:(NSInteger)section { return _tableTitles.count; } - (UITableViewCell *)tableView:(UITableView *)tableView cellForRowAtIndexPath:(NSIndexPath *)indexPath { NSString *cellIdentifier = @"Cell"; UITableViewCell *cell = [tableView dequeueReusableCellWithIdentifier:cellIdentifier]; if (!cell) { cell = [[UITableViewCell alloc]initWithStyle:UITableViewCellStyleDefault reuseIdentifier:cellIdentifier]; } cell.textLabel.text = [_tableTitles objectAtIndex:indexPath.row]; return cell; } @end |
実行すると下記の画面が表示されます。
UITableViewについては下記等ググれば一杯出てくるので参考にして下さい。
また、WatchConnectivityについては下記を参考にしました。
[watchOS 2][iOS 9] Watch Connectivity で情報をやりとりする様々な方法
WathKit App側の実装
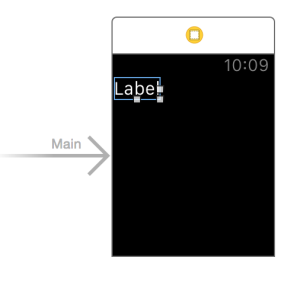
Interface.storyboardにて下記のように、InterfaceControllerへLabelを一つ貼り付け、Outletを引きます。
次にInterfaceController.mを開いて、下記のように実装します。
|
1 2 3 4 5 6 7 8 9 10 11 12 13 14 15 16 17 18 19 20 21 22 23 24 25 26 27 28 29 30 31 32 33 34 35 36 37 38 39 40 41 42 43 44 45 46 47 48 49 50 51 52 53 54 55 56 57 58 59 60 61 62 63 64 65 66 67 68 |
#import "InterfaceController.h" #import <WatchConnectivity/WatchConnectivity.h> @interface InterfaceController() <WCSessionDelegate> @property (unsafe_unretained, nonatomic) IBOutlet WKInterfaceLabel *label; @end @implementation InterfaceController - (void)awakeWithContext:(id)context { [super awakeWithContext:context]; // Configure interface objects here. } - (void)willActivate { // This method is called when watch view controller is about to be visible to user [super willActivate]; // WatchConnectivityの接続とdelegateをセット if ([WCSession isSupported]) { WCSession *session = [WCSession defaultSession]; session.delegate = self; [session activateSession]; } } - (void)session:(WCSession *)session didReceiveMessage:(NSDictionary<NSString *,id> *)message replyHandler:(void (^)(NSDictionary<NSString *,id> * _Nonnull))replyHandler { // iPhoneから来たTypeをLabelに表示 switch ([message[@"haptic_type"] integerValue]) { case WKHapticTypeNotification: [_label setText:@"Notification"]; break; case WKHapticTypeDirectionUp: [_label setText:@"DirectionUp"]; break; case WKHapticTypeDirectionDown: [_label setText:@"DirectionDown"]; break; case WKHapticTypeSuccess: [_label setText:@"Success"]; break; case WKHapticTypeFailure: [_label setText:@"Failure"]; break; case WKHapticTypeRetry: [_label setText:@"Retry"]; break; case WKHapticTypeStart: [_label setText:@"Start"]; break; case WKHapticTypeStop: [_label setText:@"Stop"]; break; case WKHapticTypeClick: [_label setText:@"Click"]; break; default: break; } // Taptic Engineでバイブレーションを行う [[WKInterfaceDevice currentDevice] playHaptic:[message[@"haptic_type"] integerValue]]; } @end |
ここまで実装したらインストールしましょう、これでアプリがiPhone、watchで起動している間、好きなだけTaptic Engineを使えます。
最後に
見て頂いたらわかると思いますが大したことしてません、Taptic Engineは一行書けば鳴らすことができます。
Taptic Engineが触れるようになったことで、より直感で操作できるアプリが作れますね。


