はじめに
ついにSpring forwardにて、Apple Watchの発売日、価格等が発表されましたね!
そんなわけで今回は、AppleWatchのWatchkitを使用し、Twitterから画像を取ってきて、一覧表示してみたいと思います。 ※画像のキャッシュもするよ!
前回:Apple Watchの開発が出来るようになったので「Watchkit」でアナログ時計を作ってみた
WatchKit開発準備
iOSアプリのプロジェクトを作って、Watchkitを追加するのですが、詳細は下記が詳しいので、前回に引き続き省略します。
1分でつくれるAppleWatch対応アプリ & WatchKit 全API解説
一覧表示のためのWKInterfaceTable
iPhoneで一覧表示といえば、UITableViewだったりUICollectionViewですね。
WatchkitではWKInterfaceTableという一覧表示用のテーブルインタフェースがあります、まずはこちらを準備しましょう。
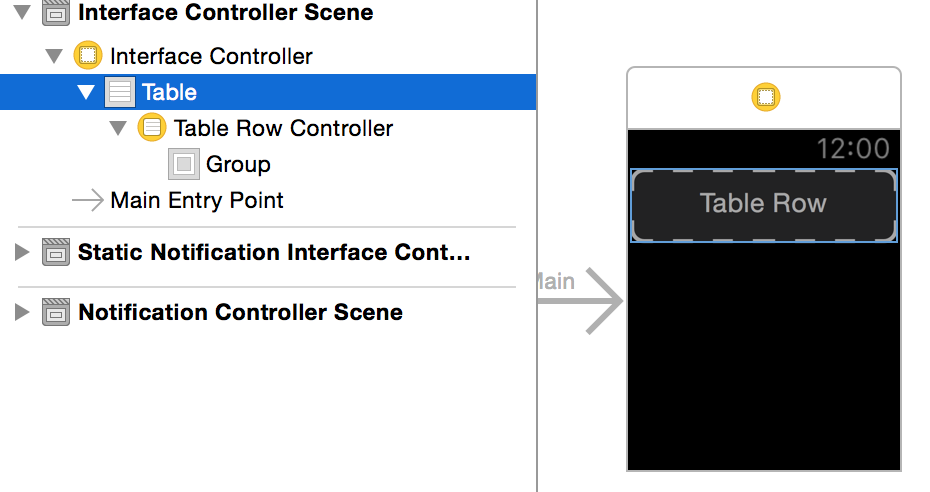
まず、Interface.storyboardで「Interface Controller Scene」を開き、「Table」をドラッグ&ドロップで追加します、すると下記のようになります。
今回は画像を一覧で出すので、一つの行には画像だけのインタフェースが必要です、なのでカスタムインタフェースを用意します。
NSObjectを継承した、Cellクラスを追加します。(名前はCellでなくてもOK)
|
1 2 3 4 5 |
#import <Foundation/Foundation.h> @interface Cell : NSObject @end |
クラスを作成したら、Interface.storyboardに戻り、「Interface Controller Scene」の「Table Row Controller」を選択して、CustomClassを「Cell」にします。
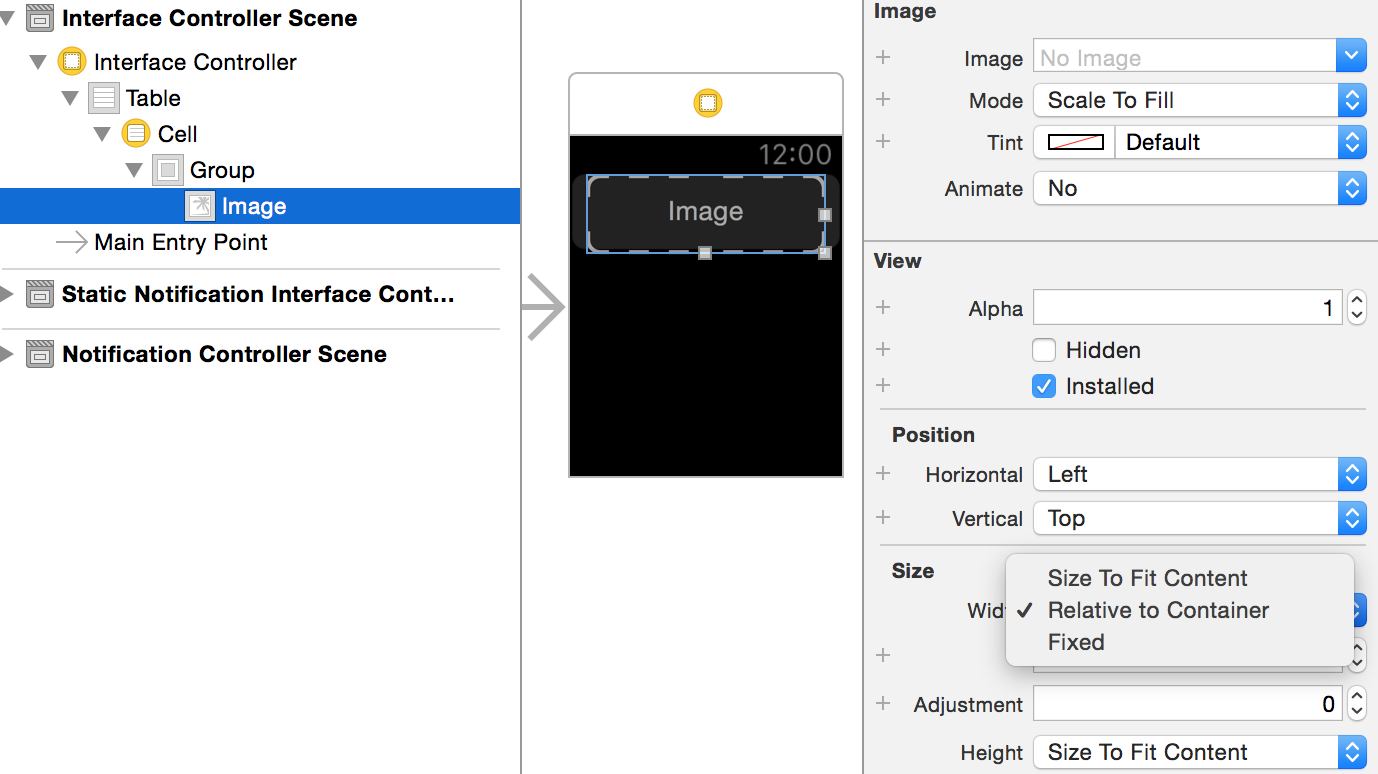
さらにCellの下の「Group」にImageを追加し、横いっぱいに出て欲しいのでwidthをRelative to Containerにします。
そしてCellクラスとImageをOutletで繋げます、CellクラスはNSObjectなので#import <WatchKit/WatchKit.h>を追記します。
最後にInterface ControllerクラスにTableをOutletで繋げます。
|
1 |
@property (weak, nonatomic) IBOutlet WKInterfaceTable *table; |
これで準備が整いました。
ちなみにWKInterfaceTableは下記を参考にしました。
Twitterから画像ツイートを取得
Social.frameworkを利用します、取得の方法はiOSと同じですので省略します。参考は下記です、iPhoneに入っているTwitterアカウントを利用して、APIを使うことができます。※設定アプリでTwitterアカウントを一つ以上存在する状態にして下さい。
iOSアプリでTwitterのタイムライン取得・ツイート投稿を行う(Accounts.frameworkとSocial.rameworkを使って)
URLは下記
|
1 |
@"https://api.twitter.com/1.1/search/tweets.json" |
パラメータは下記にしています、人気があって画像入りのリツイート無し、言語は日本で10件
|
1 2 3 4 5 6 7 |
@{ @"q" : @"filter:images exclude:retweets", @"include_entities" : @"1", @"lang" : @"ja", @"count" : @"10", @"result_type" : @"popular" }; |
取得そして、表示
これがツイートを取得して、キャッシュを使い分けながら画像テーブルに表示する全コードです。(雑)
|
1 2 3 4 5 6 7 8 9 10 11 12 13 14 15 16 17 18 19 20 21 22 23 24 25 26 27 28 29 30 31 32 33 34 35 36 37 38 39 40 41 42 43 44 45 46 47 48 49 50 51 52 53 54 55 56 57 58 59 60 61 62 63 64 65 66 67 68 69 70 71 72 73 74 75 76 77 78 79 80 81 82 83 84 85 86 87 88 89 90 91 92 93 94 95 96 97 98 99 100 101 102 103 104 105 106 107 108 109 110 111 112 113 114 115 116 117 118 119 120 121 122 123 124 125 126 127 128 129 130 131 132 133 134 135 136 137 138 139 140 141 |
#import "InterfaceController.h" #import "Accounts/Accounts.h" #import <Social/Social.h> #import "Cell.h" #define TWEET_API_URL @"https://api.twitter.com/1.1/search/tweets.json" @interface InterfaceController() { ACAccountStore *_accountStore; NSDictionary *_imageNameDict; NSDictionary *_requestParams; } - (IBAction)reloadAction; @property (weak, nonatomic) IBOutlet WKInterfaceTable *table; @end @implementation InterfaceController - (void)awakeWithContext:(id)context { [super awakeWithContext:context]; NSLog(@"awakeWithContext"); _accountStore = [[ACAccountStore alloc]init]; _imageNameDict = [[NSMutableDictionary alloc] init]; _requestParams = @{@"q" : @"filter:images exclude:retweets", @"include_entities" : @"1", @"lang" : @"ja", @"count" : @"10", @"result_type" : @"popular" }; // キャッシュ全削除 // WKInterfaceDevice *device = [WKInterfaceDevice currentDevice]; // [device removeAllCachedImages]; [self loadTable]; } - (void)willActivate { [super willActivate]; NSLog(@"willActivate"); } - (void) loadTable { if ([SLComposeViewController isAvailableForServiceType:SLServiceTypeTwitter]) { ACAccountType *twitterAccountType = [_accountStore accountTypeWithAccountTypeIdentifier: ACAccountTypeIdentifierTwitter]; [_accountStore requestAccessToAccountsWithType:twitterAccountType options:NULL completion:^(BOOL granted, NSError *error) { if (granted) { NSArray *twitterAccounts = [_accountStore accountsWithAccountType:twitterAccountType]; NSURL *url = [NSURL URLWithString:TWEET_API_URL]; SLRequest *request = [SLRequest requestForServiceType:SLServiceTypeTwitter requestMethod:SLRequestMethodGET URL:url parameters:_requestParams]; // 複数のTwitterアカウントがある場合には未対応 [request setAccount:[twitterAccounts lastObject]]; [request performRequestWithHandler:^(NSData *responseData, NSHTTPURLResponse *urlResponse, NSError *error) { if (responseData && urlResponse.statusCode == 200) { NSError *jsonError; NSDictionary *tweetData = [NSJSONSerialization JSONObjectWithData:responseData options:NSJSONReadingAllowFragments error:&jsonError]; // テーブルに表示 [self showTableImageWithTweetData:tweetData]; } else { NSLog(@"Request Error"); } }]; } else { NSLog(@"%@", [error localizedDescription]); } }]; } else { NSLog(@"twitterアカウントが無い"); } } - (void)showTableImageWithTweetData:(NSDictionary*)twData { if (twData) { NSArray *twStatuses = [twData objectForKey:@"statuses"]; // WKInterfaceTableの行数を指定 [_table setNumberOfRows:twStatuses.count withRowType:@"default"]; [twStatuses enumerateObjectsUsingBlock:^(NSDictionary *dic, NSUInteger idx, BOOL *stop) { if ([[dic objectForKey:@"entities"] objectForKey:@"media"] == nil) { return; } // 行のCellクラスを取得 Cell *row = [_table rowControllerAtIndex:idx]; NSString *urlString = [[[[dic objectForKey:@"entities"] objectForKey:@"media"] objectAtIndex:0] objectForKey:@"media_url"]; // small画像を取得 urlString = [NSString stringWithFormat:@"%@:small", urlString]; [self showCellImageWithUrl:urlString cell:row index:idx]; }]; } else { NSLog(@"JSON Error"); } } - (void)showCellImageWithUrl:(NSString *)urlString cell:(Cell*)cell index:(NSUInteger)idx { WKInterfaceDevice *device = [WKInterfaceDevice currentDevice]; NSURLSessionConfiguration *config = [NSURLSessionConfiguration defaultSessionConfiguration]; NSURLSession *session = [NSURLSession sessionWithConfiguration:config]; NSURL *url = [NSURL URLWithString:urlString]; NSString *imageName = [[urlString componentsSeparatedByString:@"/"] lastObject]; // キャッシュに画像が存在するか if ([device.cachedImages objectForKey:imageName] != nil) { NSLog(@"use cache : %@", imageName); // キャッシュから画像読み込み [cell.image setImageNamed:imageName]; } else { // キャッシュに無いので画像をダウンロード NSURLSessionDownloadTask *imageDownloadTask = [session downloadTaskWithURL:url completionHandler:^(NSURL *location, NSURLResponse *response, NSError *error) { NSLog(@"download complate : %@", imageName); UIImage *downloadedImage = [UIImage imageWithData:[NSData dataWithContentsOfURL:location]]; dispatch_async(dispatch_get_main_queue(), ^{ // キャッシュしつつ表示 [device addCachedImage:downloadedImage name:imageName]; [cell.image setImageNamed:imageName]; }); }]; [imageDownloadTask resume]; } // インデックスと画像(キャッシュ)名を対にして保存 [_imageNameDict setValue:imageName forKey:[NSString stringWithFormat:@"%ld", idx]]; } - (void)didDeactivate { [super didDeactivate]; } @end |
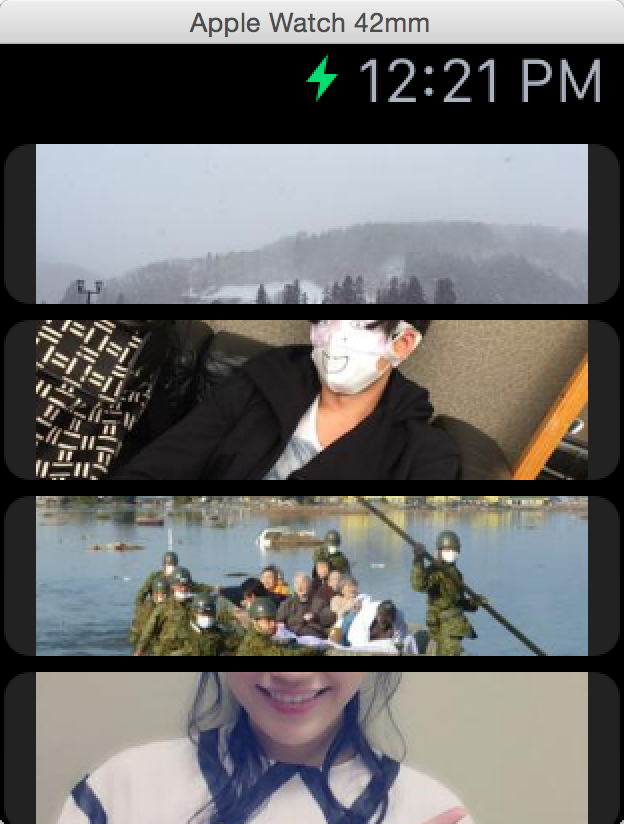
実行すると下記のように表示されます!
キャッシュ
WatchではiPhone側から画像が送られてきて、初めて表示されます、それを待っていると時間がかかってしょうがないのでキャッシュができるようになっています。
|
1 2 3 4 5 6 7 8 9 10 11 12 |
// キャッシュ周りを利用するには、WKInterfaceDeviceが必要です。 WKInterfaceDevice *device = [WKInterfaceDevice currentDevice]; // UIImageを画像名を指定してキャッシュできます。 [device addCachedImage:UIImage name:imageName]; // キャッシュした画像は下記メソッドで表示できます、画像がない場合は何も表示されません。 [image setImageNamed:imageName]; // cachedImagesにNSDictionaryでキャッシュした画像名が入っているので、そこからキャッシュされているかどうかを判断できます。 device.cachedImages // 今回利用していませんが削除もできます。 [device removeCachedImageWithName:imageName]; // 全削除 [device removeAllCachedImages]; |
詳細表示
いまのままではサムネイルが並ぶだけなので、選択したら一画面で表示するようにします。 新規にWKInterfaceControllerクラスを作成し、名前はDetailInterfaceControllerとします。
Interface.storyboardでInterfaceControllerを追加し、Custom ClassとIdentiferをDetailInterfaceControllerとして Imageも追加しておきます、Imageは画面いっぱいに表示したいのでwidthもheightもRelative to Containerにします。
次にImageとDetailInterfaceControllerにOutletを繋げます。
|
1 |
@property (weak, nonatomic) IBOutlet WKInterfaceImage *image; |
そしてInterfaceController.mに下記を追加します。行を選択した際にDetailInterfaceControllerを呼びつつ、表示画像名を渡します。
|
1 2 3 4 5 |
- (void)table:(WKInterfaceTable *)table didSelectRowAtIndex:(NSInteger)rowIndex { // 画像名を指定して詳細表示 [self presentControllerWithNames:@[@"DetailInterfaceController"] contexts:@[[_imageNameDict objectForKey:[NSString stringWithFormat:@"%ld", rowIndex]]]]; } |
最後にDetailInterfaceControllerで、画像を表示します。
|
1 2 3 4 |
- (void)awakeWithContext:(id)context { [super awakeWithContext:context]; [_image setImageNamed:context]; } |
これで行選択すると詳細に飛ぶようになり、下記のように表示されます。
メニューの追加
さらにさらに、メニューを追加してリロードできるようにします、そんなに難しくないです。 Interface.storyboardで、下記画像のようにInterface Controller SceneにMenuとMenuItemを追加して、Reload用のMenuItemとInterfaceControllerをActionで繋げます。
|
1 2 3 |
- (IBAction)reloadAction { [self loadTable]; } |
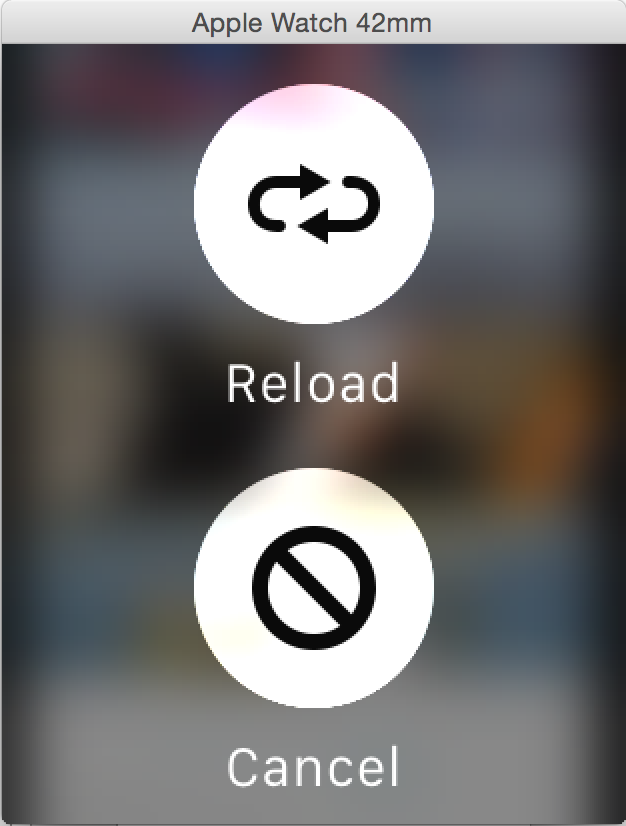
ここまでやっておくと下記のように、画面を長押しした際にメニューがでるようになります。(アイコンはちょっといじりました)
最後に
長くなりましたが以上になります。
iOSのFrameworkは大体使えますし、Tableの操作などはiOSに比べればやれることが少ない分簡単なので、色々他にもやってみたくなりました。


